A little background
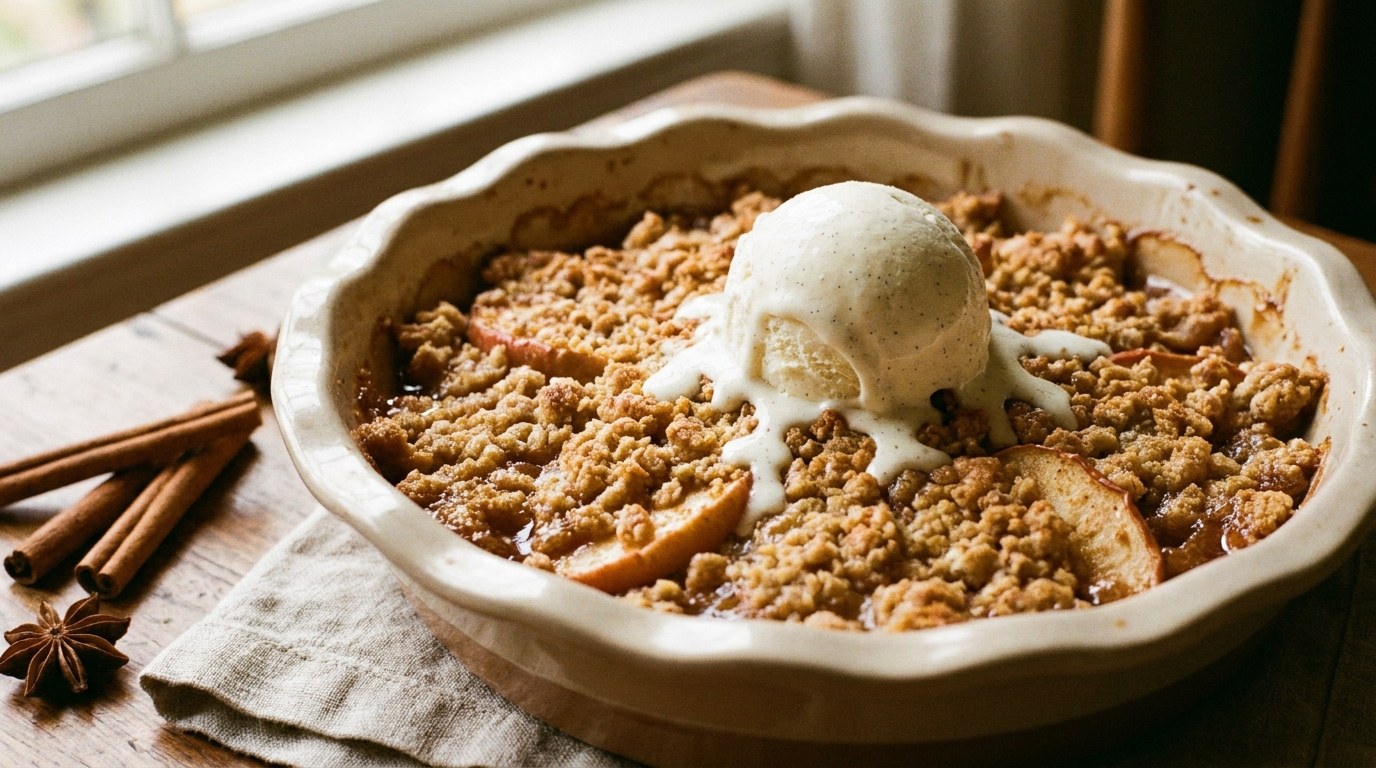
Using a mixture of firm sweet apples and sharper apples gives a more rounded filling than a single very sweet variety. Cut the slices to a similar thickness so they soften together. Cornflour catches some of the released juice, but the filling should still be juicy. The topping is deliberately clumpy rather than sandy, giving both crisp edges and softer buttery pieces.
THE RECIPE
Ingredients for Apple Crisp
Yield: 6 servings. Measure the ingredients before starting, and keep optional additions separate until needed.
- 6 medium apples, peeled and sliced
- 2 tablespoons lemon juice
- 3 tablespoons brown sugar
- 1 teaspoon ground cinnamon
- 1 tablespoon cornflour / cornstarch
- 3/4 cup rolled oats
- 1/2 cup plain flour
- 1/3 cup brown sugar for topping
- 5 tablespoons cold butter, diced
- 1 pinch salt
Step-by-step instructions
- Heat the oven to 375°F / 190°C. Lightly grease a medium baking dish.
- Toss the sliced apples with lemon juice, 3 tablespoons sugar, cinnamon, and cornflour. Spread in the dish.
- Mix oats, flour, topping sugar, and salt. Rub in the cold butter with your fingers until coarse clumps form.
- Scatter the topping evenly over the apples without pressing it firmly down.
- Bake for 40–45 minutes until the apples are tender, the juices bubble at the edges, and the top is golden. Rest for 15 minutes before serving.
Cooking tips and troubleshooting
A browned topping does not prove the fruit underneath is cooked. Insert a knife into the centre to check the apples, and cover loosely with foil if the top is ready too soon. A short rest gives the bubbling juices time to thicken.
Prepare the tin and oven first
Baking is easier when the oven is heated and the tin or tray is ready before the batter or dough is finished. Use the size specified in the instructions because depth affects how quickly the centre cooks. Grease corners where needed and leave a useful parchment overhang if the bake will be lifted out. Do not let paper touch an exposed heating element. A middle oven shelf is a sensible starting position unless the recipe says otherwise. An oven that runs hot or cool may need a timing adjustment.
Measure before making substitutions
Flour, fat, sugar, eggs, and liquid all affect structure as well as flavour. Replacing a large amount of one ingredient can change how the mixture rises or sets. Use the stated formula for the first attempt, then consider the specific variations listed here. Weighing flour is useful where a weight is provided; otherwise spoon it lightly into the measuring cup and level it. Pressing flour firmly into a cup adds more than intended and can make a bake dry. Ingredient temperatures matter too, particularly when butter is described as cold or softened.
Combine in the stated order
The mixing order helps distribute leavening, dissolve some sugar, and control how much air enters the mixture. Whisk dry ingredients separately when directed so baking powder, soda, cocoa, or spices do not remain in small pockets. Add flour gently at the final stage rather than beating for a long time. A loaf or cake mixture should become uniform without being worked excessively. For a crumb topping or short base, preserve the intended small pieces or crumbs instead of trying to turn it into a smooth batter.
Use more than one doneness cue
Colour is useful but not sufficient. A dark crust can hide an undercooked centre, and a chocolate bake can make browning difficult to see. Follow the specific skewer, wobble, or tenderness check in the recipe. Begin checking near the early end of the time range. If the top browns before the middle is ready, a loose piece of foil can protect it while cooking continues. Do not keep opening the oven every minute, which releases heat and makes the timing less predictable.
Allow the structure to settle
Many baked mixtures are fragile when hot. A short rest in the tin helps them hold together, and further cooling on a rack lets moisture escape. Cutting too early can make a loaf look gummy or cause a filling to run even when it has been baked correctly. Frosting requires a completely cool surface. Follow any refrigeration step for a soft filling before slicing. A sharp clean knife gives neater portions; wipe it between cuts when the topping or centre is sticky.
Store according to the filling
A dry cookie and a dairy-frosted cake do not have the same storage needs. Follow the specific guidance for this recipe rather than leaving every bake on the counter. Wrap only after cooling so trapped steam does not wet the surface. For freezing, separate portions and label the container with the recipe and date. Thaw covered when appropriate to limit drying. Reheating can refresh some textures, but it will not reverse an overbaked or stale crumb, so portioning and timely storage are more useful than prolonged warming.
Variations to try
Replace up to half the apples with firm pears. Use a baking-style vegan butter for a dairy-free topping. Cinnamon can be paired with a pinch of ginger, but too much spice can hide the flavour of the fruit.
Serving suggestions
Serve warm with plain yogurt, vanilla ice cream, or a spoonful of plant-based cream. Small portions make a comfortable finish to a substantial dinner.
Storage and leftovers
Cover and refrigerate leftovers for up to 3 days. Reheat uncovered in the oven; the topping loses some crispness in the refrigerator.
Planning, ingredients, and portions
Read the ingredient labels
Ingredient names describe a role in the recipe, but packaged products can contain additional seasonings, sweeteners, or allergens. Choose plain versions where the list specifies plain yogurt, purée, tomatoes, or milk. Check broth, sauces, chocolate, bread, and spice blends individually rather than assuming the dish name tells you everything about its ingredients. If cooking for someone with an allergy, ask about their requirements and prevent cross-contact with utensils and surfaces. A vegetarian recipe can still contain milk, eggs, wheat, soy, sesame, or nuts. The suggested variations are flavour and cooking options, not a guarantee that every product on your shelf fits a particular diet.
Scale ingredients without scaling every minute
For a smaller batch, reduce the ingredient quantities proportionally and choose equipment that still allows the intended depth or space. For a larger batch, doubling ingredients does not always mean using one larger pan or doubling the cooking time. Crowding, depth, and evaporation change how the food cooks. Work in batches where the method depends on browning or handling individual portions. Keep the doneness checks in the instructions as your final guide. Divide leftovers into useful portions rather than reheating the entire batch repeatedly. If a recipe includes a small quantity of salt or a strong spice, start conservatively and taste before making the final adjustment.
Understand the estimated nutrition
The nutrition figures below are rough editorial estimates per stated serving of the base recipe. They are not laboratory results and should not be treated as precise dietary advice. Brands, portion sizes, optional garnishes, ingredient substitutions, and how much cooking fat remains in the dish can all change the result. The figures cover calories, protein, carbohydrate, and fat; they do not provide a complete micronutrient or sodium analysis. If you need accurate values for a medical or carefully controlled dietary plan, calculate the recipe using the specific products and quantities you actually use, then divide by the measured number of portions.
Plan the meal around the recipe
Consider what this recipe already contributes before choosing a side. A vegetable side may need beans, grains, eggs, or another suitable component to make a satisfying meal, while a substantial pasta, bean bowl, or filled wrap may need only fresh vegetables alongside. Sweet bakes are portions of dessert or baking rather than a complete meal simply because they include fruit or vegetables. Appetite and individual needs vary, so the stated yield is a practical way to divide the batch, not a rule about how much every person must eat. The serving suggestions below are intended to help you build a meal with contrasting textures and flavours.
Nutrition information
Approximate nutrition per serving of the base recipe; optional toppings and substitutions are excluded. These figures are editorial estimates, not a verified analysis.
- Energy
- 340 kcal
- Protein
- 4 g
- Carbohydrate
- 55 g
- Fat
- 13 g
Frequently asked questions
How do I know apple crisp is ready?
The target is soft apple slices under a golden, irregular oat crumble. Use that description alongside the specific checks in the final cooking or assembly step. The suggested 65 minutes is a guide for active preparation and cooking, and it does not override the visible or texture cues. Ingredient sizes and equipment can change the timing. Check a representative portion rather than assuming the first piece you see represents the whole batch.
Can I prepare this recipe ahead?
Cover and refrigerate leftovers for up to 3 days. Reheat uncovered in the oven; the topping loses some crispness in the refrigerator. Prepare any durable ingredients first and keep delicate finishing ingredients separate where practical. When planning ahead, allow time for the final cooking, reheating, or assembly rather than assuming the dish can sit at room temperature until the meal. Food should be stored in a clean covered container, and fresh toppings should be added close to serving.
What should I change if the texture is wrong?
A browned topping does not prove the fruit underneath is cooked. Insert a knife into the centre to check the apples, and cover loosely with foil if the top is ready too soon. A short rest gives the bubbling juices time to thicken. Review ingredient quantities and the stage at which the texture changed before adding several new ingredients. A small correction is easier to assess than a large one. If extra liquid is suitable, add it gradually; if more cooking is required, continue gently and check again. The technique notes above explain the main controls for this type of recipe.
Can I change the ingredients for my diet?
Replace up to half the apples with firm pears. Use a baking-style vegan butter for a dairy-free topping. Cinnamon can be paired with a pinch of ginger, but too much spice can hide the flavour of the fruit. Read labels for the exact products you use, including toppings and sides. One substitution does not automatically remove all allergens. Keep the core quantities stable and choose one suggested change for a first attempt.
Bring it to the table
Apple Crisp works best when you focus on its main ingredients and the texture described here: soft apple slices under a golden, irregular oat crumble. Prepare the components in order, taste where appropriate, and choose a simple accompaniment rather than adding unnecessary complexity. Serve warm with plain yogurt, vanilla ice cream, or a spoonful of plant-based cream. Small portions make a comfortable finish to a substantial dinner. Keep a note of the timing and seasoning that suited your equipment so your next batch is easier to plan.