A little background
A simple dough is the foundation here, with a short ingredient list and enough kneading to develop elasticity. The rise is guided by the dough increasing in volume rather than the clock alone. Thinly sliced vegetables cook quickly enough to suit a hot, short bake. A preheated tray improves the base without requiring a specialist pizza oven.
THE RECIPE
Ingredients for Homemade Pizza
Yield: 4 servings; 2 small pizzas. Measure the ingredients before starting, and keep optional additions separate until needed.
- 3 cups / 375 g strong white bread flour
- 1 teaspoon instant yeast
- 1 teaspoon fine salt
- 1 cup / 240 ml lukewarm water, plus a little if needed
- 1 tablespoon olive oil
- 3/4 cup plain crushed tomatoes
- 1/2 teaspoon dried oregano
- 1 cup grated mozzarella
- 1 bell pepper, thinly sliced
- 1/2 small red onion, thinly sliced
- 1 handful basil leaves
Step-by-step instructions
- Mix flour, yeast, and salt. Add water and oil, then knead for 8–10 minutes until smooth and elastic.
- Cover in a lightly oiled bowl and let rise for 60 minutes or until roughly doubled; a cool kitchen may take longer.
- Heat the oven to 475°F / 245°C with a sturdy baking tray inside. Mix tomatoes with oregano.
- Divide the dough into two pieces, shape into rounds on baking parchment rated for the temperature, and spread with tomato. Add cheese, pepper, and onion sparingly.
- Transfer carefully to the hot tray and bake for 12–16 minutes until the base and edges are browned and the cheese bubbles. Add basil after baking.
Cooking tips and troubleshooting
Too many wet toppings weigh down the centre and can leave the base soggy. Spread the tomatoes thinly and keep the vegetable layer light. If the dough resists stretching, let it rest for 10 minutes so the gluten relaxes.
Start with workable dough
Yeast dough begins with a balance between flour and water. Use lukewarm rather than hot water, which can damage the yeast. Mix until no dry flour remains, then knead as directed. The dough should feel slightly tacky but manageable. Flour absorbs water differently depending on its strength and storage, so a small adjustment may be needed. Add water or flour gradually rather than making a large change. A dough that feels wet at first often becomes easier to handle after several minutes of kneading.
Give the rise enough time
The rise depends on kitchen temperature, yeast activity, and dough temperature. The clock gives a guide, but a clear increase in volume is the more useful cue. Keep the bowl covered so the surface does not dry into a skin. A warm place should be comfortable rather than hot; do not put the bowl directly on a strong heater. If the kitchen is cool, allow more time. Starting the dough earlier is more reliable than trying to force a very fast rise with excessive warmth.
Handle without forcing the shape
Once risen, divide the dough gently and shape each piece. If it springs back, cover it and rest for a few minutes before stretching again. That pause lets the gluten relax. Use your hands to preserve some air in the edge, or a rolling pin if a thinner base is preferred. The middle should be reasonably even so it cooks consistently. Do not repeatedly pull a weak thin spot until it tears; ease the surrounding dough outward instead.
Preheat the cooking surface
A hot tray or suitable baking stone helps the base set before the topping releases too much moisture. Follow the equipment instructions and allow adequate preheating time. Handle the hot surface with proper oven gloves and plan the transfer before loading the pizza. Baking parchment must be rated for the oven temperature. A very deep dish does not give the same result as a broad hot surface, so choose equipment that suits the method rather than expecting identical timing across every pan.
Keep toppings restrained
A thin layer of sauce and modest amount of vegetables allow the base to bake rather than steam. Slice vegetables finely enough to cook in the short oven time. Excess liquid from tomatoes or wet toppings can soften the centre, so drain where needed. Spread toppings evenly but leave a useful edge. Fresh herbs are often best after baking. If using a dairy-free cheese, check its guidance because some products melt differently and can dry out when exposed for too long.
Judge the base as well as the top
Bubbling cheese does not guarantee the dough is cooked. Check the underside and edge for colour and structure. If the top is ready but the base is pale, the cooking surface may not have been hot enough. Let the finished pizza rest briefly before slicing so the topping settles. Refrigerate leftovers promptly and reheat on a suitable hot surface if you want to improve the base texture. Dough and finished pizza have different storage needs, so do not apply a cooked-slice timetable to raw yeast dough.
Variations to try
Use mushrooms or olives in place of the pepper, keeping the total quantity similar. For a vegan pizza, use a suitable dairy-free cheese or omit cheese and finish with a little olive oil. Do not add large raw vegetable chunks that need a long cooking time.
Serving suggestions
Cut into wedges and serve with a green salad. Let the pizza stand for a minute after baking so the molten topping settles before slicing.
Storage and leftovers
Refrigerate leftover slices within 2 hours and use within 3 days. Reheat on a hot tray or covered skillet until the centre is hot.
Planning, ingredients, and portions
Read the ingredient labels
Ingredient names describe a role in the recipe, but packaged products can contain additional seasonings, sweeteners, or allergens. Choose plain versions where the list specifies plain yogurt, purée, tomatoes, or milk. Check broth, sauces, chocolate, bread, and spice blends individually rather than assuming the dish name tells you everything about its ingredients. If cooking for someone with an allergy, ask about their requirements and prevent cross-contact with utensils and surfaces. A vegetarian recipe can still contain milk, eggs, wheat, soy, sesame, or nuts. The suggested variations are flavour and cooking options, not a guarantee that every product on your shelf fits a particular diet.
Scale ingredients without scaling every minute
For a smaller batch, reduce the ingredient quantities proportionally and choose equipment that still allows the intended depth or space. For a larger batch, doubling ingredients does not always mean using one larger pan or doubling the cooking time. Crowding, depth, and evaporation change how the food cooks. Work in batches where the method depends on browning or handling individual portions. Keep the doneness checks in the instructions as your final guide. Divide leftovers into useful portions rather than reheating the entire batch repeatedly. If a recipe includes a small quantity of salt or a strong spice, start conservatively and taste before making the final adjustment.
Understand the estimated nutrition
The nutrition figures below are rough editorial estimates per stated serving of the base recipe. They are not laboratory results and should not be treated as precise dietary advice. Brands, portion sizes, optional garnishes, ingredient substitutions, and how much cooking fat remains in the dish can all change the result. The figures cover calories, protein, carbohydrate, and fat; they do not provide a complete micronutrient or sodium analysis. If you need accurate values for a medical or carefully controlled dietary plan, calculate the recipe using the specific products and quantities you actually use, then divide by the measured number of portions.
Plan the meal around the recipe
Consider what this recipe already contributes before choosing a side. A vegetable side may need beans, grains, eggs, or another suitable component to make a satisfying meal, while a substantial pasta, bean bowl, or filled wrap may need only fresh vegetables alongside. Sweet bakes are portions of dessert or baking rather than a complete meal simply because they include fruit or vegetables. Appetite and individual needs vary, so the stated yield is a practical way to divide the batch, not a rule about how much every person must eat. The serving suggestions below are intended to help you build a meal with contrasting textures and flavours.
Nutrition information
Approximate nutrition per serving of the base recipe; optional toppings and substitutions are excluded. These figures are editorial estimates, not a verified analysis.
- Energy
- 520 kcal
- Protein
- 20 g
- Carbohydrate
- 76 g
- Fat
- 15 g
Frequently asked questions
How do I know homemade pizza is ready?
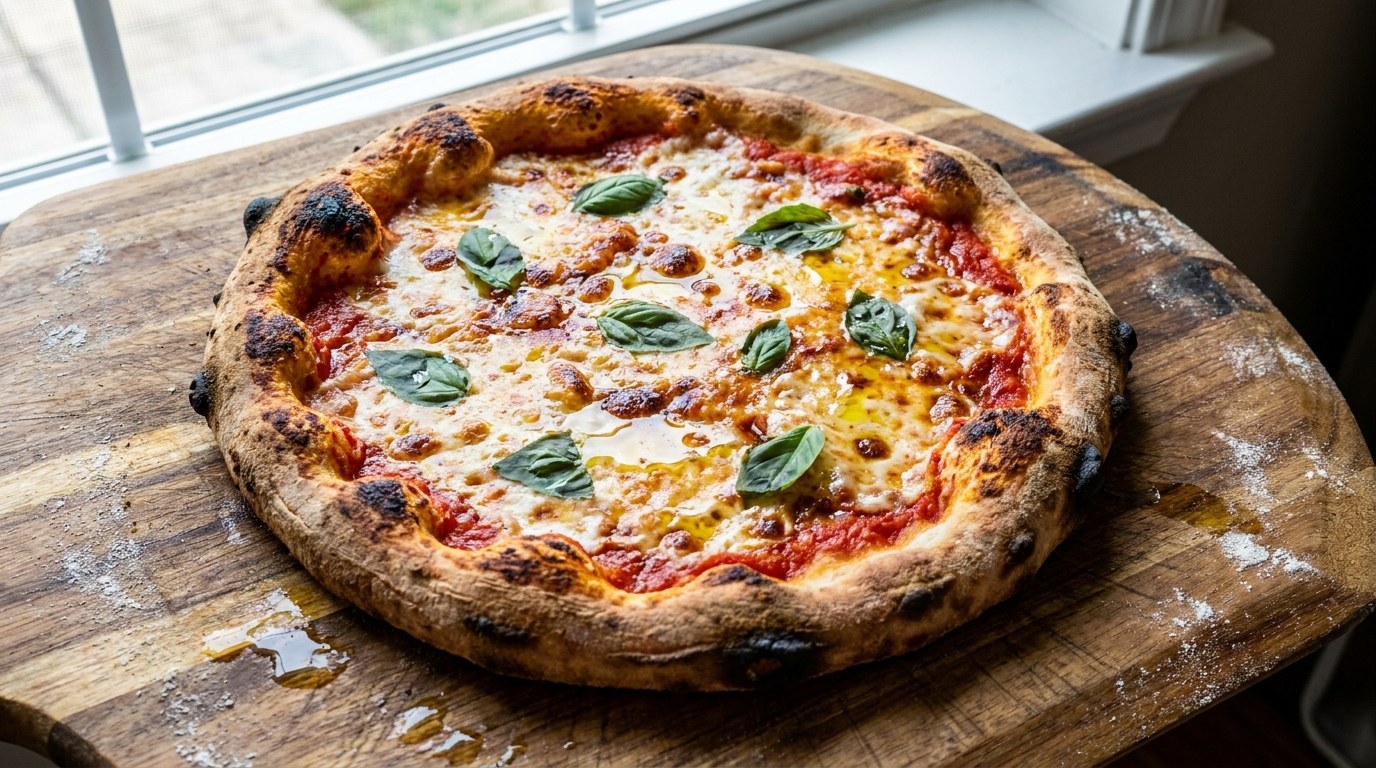
The target is a browned, firm base with an airy edge and a modest layer of bubbling topping. Use that description alongside the specific checks in the final cooking or assembly step. The suggested 110 minutes is a guide for active preparation and cooking, and it does not override the visible or texture cues. Ingredient sizes and equipment can change the timing. Check a representative portion rather than assuming the first piece you see represents the whole batch.
Can I prepare this recipe ahead?
Refrigerate leftover slices within 2 hours and use within 3 days. Reheat on a hot tray or covered skillet until the centre is hot. Prepare any durable ingredients first and keep delicate finishing ingredients separate where practical. When planning ahead, allow time for the final cooking, reheating, or assembly rather than assuming the dish can sit at room temperature until the meal. Food should be stored in a clean covered container, and fresh toppings should be added close to serving.
What should I change if the texture is wrong?
Too many wet toppings weigh down the centre and can leave the base soggy. Spread the tomatoes thinly and keep the vegetable layer light. If the dough resists stretching, let it rest for 10 minutes so the gluten relaxes. Review ingredient quantities and the stage at which the texture changed before adding several new ingredients. A small correction is easier to assess than a large one. If extra liquid is suitable, add it gradually; if more cooking is required, continue gently and check again. The technique notes above explain the main controls for this type of recipe.
Can I change the ingredients for my diet?
Use mushrooms or olives in place of the pepper, keeping the total quantity similar. For a vegan pizza, use a suitable dairy-free cheese or omit cheese and finish with a little olive oil. Do not add large raw vegetable chunks that need a long cooking time. Read labels for the exact products you use, including toppings and sides. One substitution does not automatically remove all allergens. Keep the core quantities stable and choose one suggested change for a first attempt.
Bring it to the table
Homemade Pizza works best when you focus on its main ingredients and the texture described here: a browned, firm base with an airy edge and a modest layer of bubbling topping. Prepare the components in order, taste where appropriate, and choose a simple accompaniment rather than adding unnecessary complexity. Cut into wedges and serve with a green salad. Let the pizza stand for a minute after baking so the molten topping settles before slicing. Keep a note of the timing and seasoning that suited your equipment so your next batch is easier to plan.